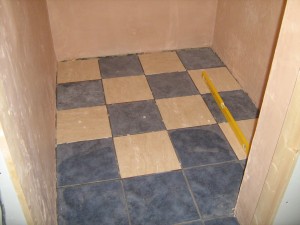
This week I’ve been doing a bit of tiling. First room is the cold store; it needed a floor. I’ve been picking up cheep tiles on offer at the DIY store, and thought I had enough to do a nice checker pattern. Two nice tiles: one a grey blue, the other an off-white. First thing – check the tiles are the same size. Oddly enough the white ones are 5mm bigger than the blue ones. Second – check you have enough of both colours. It was a small room, I could have just laid them out on the floor to check….So I got half way through and realised I was short of 1 while tile.

So after a quick trip into town I got the floor finished. They are ceramic so don’t cut using the scoring / snap method. I used a diamond blade in a 4″ angle grinder. If you don’t want chips along the edge of the cut, best to put masking tape along the line of the cut, and cut through the tape. Turned out quite well, and the size difference in the tiles doesn’t look too bad!
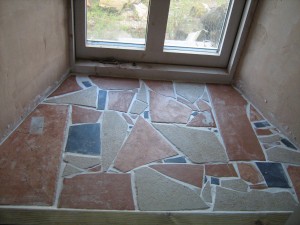
Next I had a window sill in the boiler room to do, I had some odd sample tiles lying around so thought I would try to alternate them in a random pattern. Thought I would save time by scoring and snapping – bad move! I ended up going for the crazy paving look, and dropping the tiles on the floor the get more pieces.

I’m quite pleased with the effect, even though it wasn’t how I’d planned it!